DIY Pre-Made River Kits
HOW TO
Getting Started
After you unpack the kit, use the Wypall pads to clean out any dust or dirt inside your re-usable form. Lay out all your pieces and decide on the lay out you would like for your piece.
Once the wood is laid out in your No-Seal Form, calculate to see how much resin you will need before you pour. The amount that came in your kit may have a little extra for future projects. You can either mix the entire kit and flood coat your project, or mix the exact amount you need and save the excess for another piece.

Preparing your Pieces
Safely cut your wood to size with either a table, mitre, band or jig saw. It is best to dry fit your pieces and make the layout before clamping everything down. If you don't have clamps you can use anything heavily weighted. Make sure to put the HDPE block underneath so that any resin overflow does not stick to it.

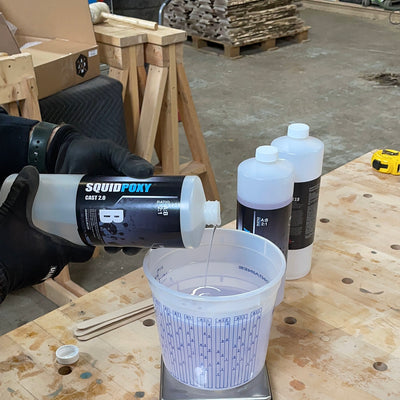
Mixing The Resin
Read the label on the resin you are using carefully. You want to make sure you are mixing the proper ratio and pouring within the suggested temperature range. Squid Poxy 2.0 has a 2:1 Ratio and cures between 96 - 120 hours. Make sure to measure according to ratio and not weight.
To check your resin calulation and how much you need CLICK HERE
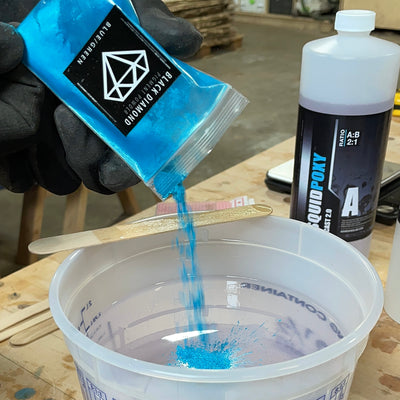
Adding Pigment
Suggested : 1/8 teaspoon per 1 litre will give you medium transparency for metallic pigments. A little bit of pigment goes a long way. We suggest to add a small amount to your pour and add a little bit at a time while throughly mixing in-between until you achieve the desired look. For more information about Pigment Transparency and how to achieve a certain look, CLICK HERE
Pouring Your Resin
To Avoid flood coating your piece and to save you time on sanding, line the outside edges of the area you are pouring with hot glue. This will create a dam when pouring your epoxy. The Wypall pads are good for clean up of any resin spillage you may have. CLICK HERE for video reference

Getting your Project Out of the Form
Take off all the clamps and set them aside. For removal, make sure to use a rubber mallet to release all the edges. Stay away from the corners of the form and instead hit the piece along the longer form walls. You will know when the form sides release from the epoxy when you hear a 'crack' when hit. This sound is the epoxy edge breaking away from the form. Once the edges are free, flip the piece upside down. If it does not fall out right away, give it a few taps on the bottom and you should hear the piece pop right out. For Video reference WATCH THIS

Start with this:

Finish with this!

Finishing
When applying the oil, make sure the surface is dust free.
Rubio Monocoat suggests to sand up to no greater than 150g for best results. We recommend to go no higher than 220g when using this oil.
Walrus Cutting Board Oil suggests to sand between 320g - 600g.
Pour the oil on your surface and use something plastic (Squeegee or old credit card) to spread it over the surface. Use the Wypall pads to rub the oil in and hand buff into the surface. Start with the bottom of your piece, flip over to complete the top and sides. You can use your HDPE clamping blocks if they are clean to have your piece on top of to allow air flow and circulation for optimal curing. To watch a Video of the Oiling process
CLICK HERE
Processing
Once your piece is out of the form, you can trim it to your desired finish size safely using a table, chop, jig or band saw.
Sanding
We use an orbital Disc Sander to finish all of our pieces. You can either break the sharp edges with this or use a router. We typically use a 1/4" round over bit. Begin sanding at 80g > 100g > 120g > 140g > 150g. You can use the Wypall pads to dust off the surface of the wood in-between each sanding grit. Between 140g and 150g we like to 'water pop' (AKA Spray water on the piece) and let it dry before the final sand. This allows the fine fibers in the wood to stand so you can get a smoother finish with your final sand.


