
Honeycomb Router Template (Clear Acrylic)
Trusted by 57,000+ Happy Customers
Fast Shipping
Pick-up available in Mississauga
Questions? Call: 416-900-9225
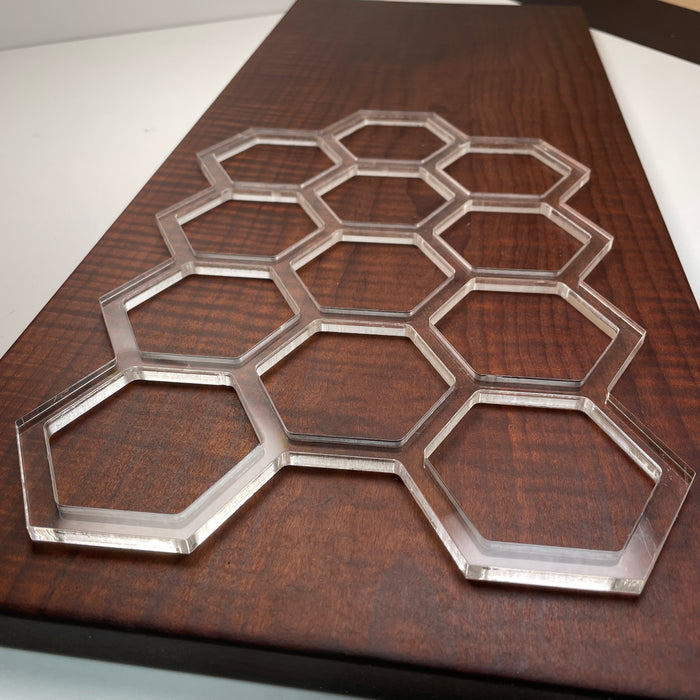
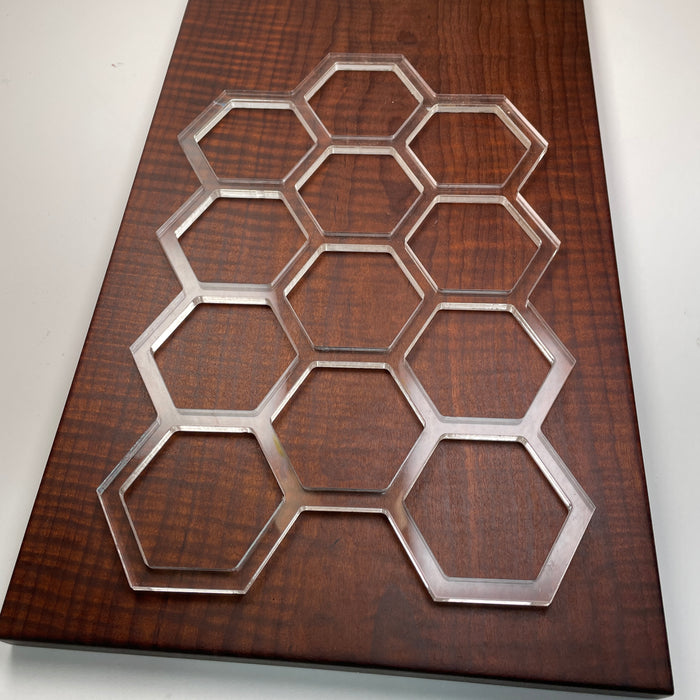
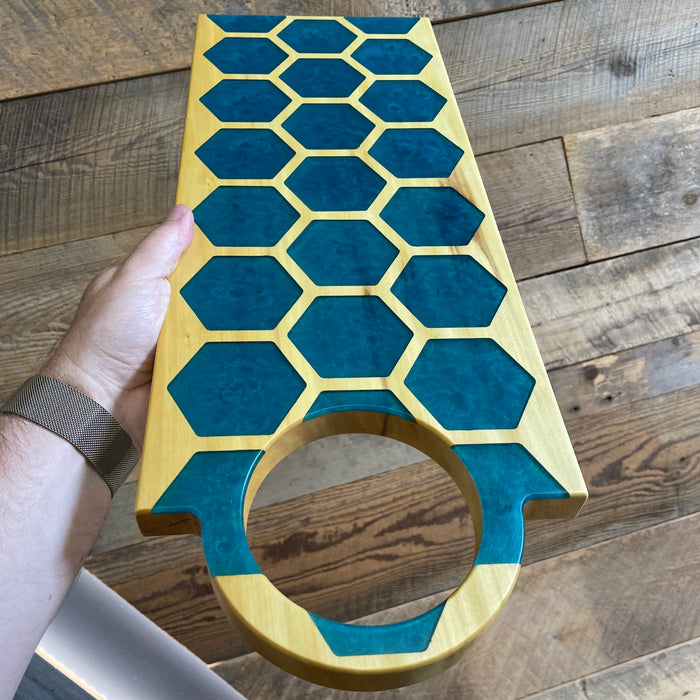
Honeycomb Inlay Acrylic Router Template
Create honeycomb inlays, epoxy-filled details, repeating geometric patterns, and decorative accents in your woodworking projects with this reusable clear acrylic router template. This template is a great choice for adding a clean honeycomb detail to charcuterie boards, serving boards, live edge pieces, trays, furniture parts, wall art, and custom woodworking projects.
The clear acrylic makes it easy to position the honeycomb pattern exactly where you want it, allowing you to work around grain, knots, cracks, live edge features, epoxy areas, or other details in your board.
What You Can Make With This Template
- Honeycomb epoxy inlays
- Decorative inlay details for charcuterie boards
- Inlay accents for serving boards and trays
- Repeating geometric patterns on woodworking projects
- Live edge board details
- Wall art, signs, furniture accents, and custom gifts
- Small-batch market products and repeatable shop projects
Why Use a Clear Acrylic Honeycomb Inlay Template?
- Repeatable honeycomb pattern: Use the template multiple times to continue the pattern in different directions.
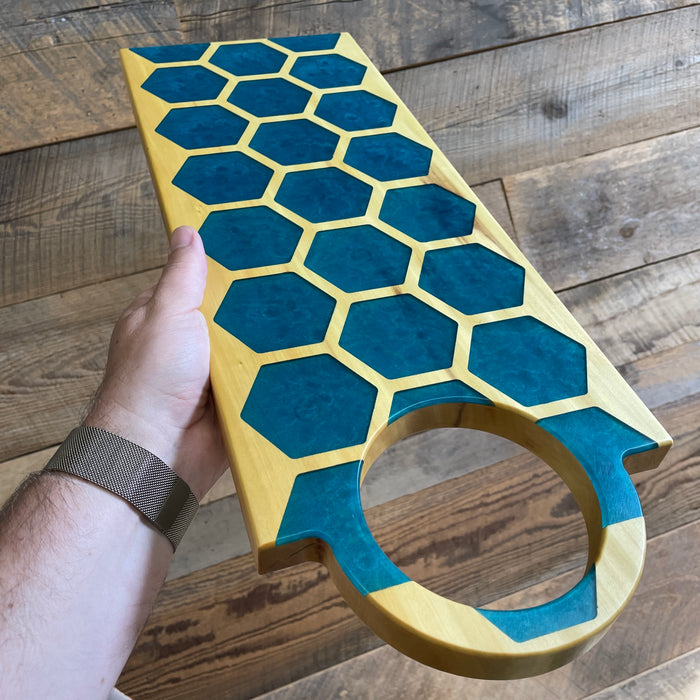
- Great for epoxy inlays: Route the honeycomb pockets, fill them with coloured epoxy, sand flush, and finish your project.
- Clear placement: See the wood underneath so you can position the inlay around grain, cracks, knots, live edge details, or other features.
- Reusable acrylic: Made from 1/4" thick clear acrylic for repeated use when handled and stored properly.
- Useful for small shops: A simple way to add repeatable decorative detail without drawing the honeycomb layout by hand.
Recommended Products to Use With This Template
To make a finished honeycomb inlay, most customers will need a way to secure the template, the right router bits, suitable wood, epoxy, pigment, and a finish for the completed piece.
- Template Tape - used to secure the acrylic template to your wood while routing the inlay pockets.
- Pocketing Bit - useful for removing the majority of the material in larger, less detailed areas.
- Small Detail Pocketing Bit - useful for smaller details and tighter areas in the honeycomb pattern.
- Dimensional Wood - choose from kiln-dried hardwoods for boards, trays, panels, and custom woodworking projects.
- Live Edge Wood - a popular choice when adding inlay details to charcuterie boards and natural edge projects.
- EcoPoxy UVPoxy - a good epoxy option for filling shallow inlays up to 1/4" deep.
- Beaver Dust Pigments - use pigment to add colour, shimmer, or contrast to epoxy-filled honeycomb inlays.
- Walrus Oil Cutting Board Oil - a good choice for food-contact boards when your project is being used as a serving board or charcuterie board.
- Grand Finishing Hardwax Oil - a great option for decorative boards, trays, wall art, furniture accents, and other non-cutting-board projects.
How to Use This Honeycomb Inlay Template
- Choose your project: Start with a flat, stable piece of wood, serving board, tray, panel, or live edge board.
- Plan the inlay location: Place the clear acrylic template over the wood and position the honeycomb pattern where it works best with the grain, knots, cracks, or design of the piece.
- Attach the template: Apply template tape to the back of the acrylic template and press it firmly onto the wood.
- Route the larger areas: Use the pocketing bit to remove most of the material in the larger, less detailed areas of the pattern.
- Clean up the small details: Use the small detail pocketing bit for tighter areas and finer honeycomb details. Take your time, especially when working with hard or dense woods.
- Repeat the pattern if needed: Remove and reposition the template to continue the honeycomb pattern in another direction or extend the design across your project.
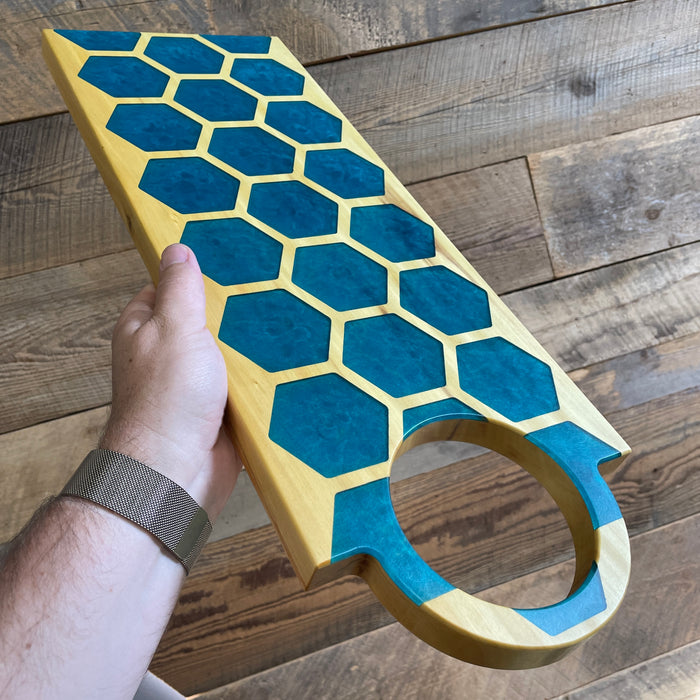
- Fill the inlay: If desired, fill the routed pockets with epoxy and pigment. UVPoxy is a good option for shallow inlays up to 1/4" deep.
- Sand flush and finish: Once the epoxy has cured, sand the inlay flush with the surface and apply the right finish for your project.
Watch: How to Use Acrylic Router Templates
New to template routing? This video walks through the process and helps explain how acrylic templates, router bits, and template tape work together.
Template Details
- Material: Clear acrylic
- Thickness: 1/4"
- Overall template size: 12" long x 7.875" wide
- Border detail: 5/16" / 0.312"
- Honeycomb width: 2.25"
- Honeycomb height: 2.5"
- Use for: Routing inlay pockets, epoxy inlays, decorative accents, and repeatable honeycomb patterns
- Product type: Reusable acrylic inlay router template
- Finished project style: Honeycomb inlay, epoxy-filled inlay, charcuterie board detail, live edge board accent, tray detail, wall art, or furniture accent
- Template SKU: 04-007
Helpful Router Template Guides
Not sure which router bit to use or how to get started with acrylic templates? These guides can help before you begin your project.
Frequently Asked Questions
Is this a finished honeycomb inlay?
No. This listing is for the reusable clear acrylic honeycomb inlay template only. Wood, router bits, template tape, epoxy, pigment, sanding supplies, and finish are sold separately.
Can this honeycomb template be reused?
Yes. This acrylic template is reusable when handled carefully, cleaned as needed, and stored flat between uses.
Can I repeat the honeycomb pattern?
Yes. You can reposition the template and repeat the honeycomb pattern in different directions to extend the design across your project.
What router bit should I use with this inlay template?
For honeycomb inlays, we recommend using the pocketing bit to remove the majority of the material and the small detail pocketing bit for tighter areas and smaller details.
Can I fill the routed honeycomb inlay with epoxy?
Yes. You can fill the routed honeycomb pockets with epoxy and pigment. UVPoxy is a good option for shallow pours up to 1/4" deep.
What projects work well with honeycomb inlays?
Honeycomb inlays work well on charcuterie boards, live edge boards, serving boards, trays, wall art, signs, furniture parts, and decorative woodworking projects.
What finish should I use?
For food-contact serving boards or charcuterie boards, use a food-safe cutting board oil such as Walrus Oil Cutting Board Oil. For decorative or non-food-contact projects, Grand Finishing Hardwax Oil is another great option.
Create Honeycomb Inlays With a Repeatable Pattern
Whether you are adding one honeycomb detail to a charcuterie board or repeating the pattern across a larger woodworking project, this clear acrylic inlay router template helps you create consistent routed pockets that can be left as a subtle carved detail or filled with coloured epoxy for contrast.


