How to Choose Wood Pieces for Epoxy Projects
Choosing wood for an epoxy project is different from buying regular lumber. For resin work, the shape, grain, live edge, cracks, voids, colour, thickness, and overall layout of the wood all become part of the finished design.
Whether you are making an epoxy charcuterie board, serving board, resin tray, river-style pour, wall art, or a custom woodworking project, this guide will help you choose the right piece before you start pouring.
Start With the Project You Want to Make
The best wood piece depends on the finished project. A small epoxy serving board needs different wood than a larger live edge resin pour or wall art piece. Before choosing a piece, think about the final size, shape, epoxy colour, and how much of the design should be wood versus resin.
| Project Type | What to Look For | Helpful Product Links |
|---|---|---|
| Epoxy Charcuterie Board | Smaller hardwood pieces with attractive grain, natural edges, voids, or cracks that can be filled with epoxy. | One-of-a-Kind Wood Pieces |
| Serving Board or Tray | Pieces with enough width for a usable surface, balanced grain, and a shape that works well in a rectangular or round mold. | HDPE Epoxy Molds |
| River-Style Board | Two pieces with live edges or natural curves that can create a channel for the epoxy pour. | Mold Size Guide |
| Wall Art or Resin Art | Highly figured wood, burl, unusual shape, dramatic grain, or strong colour contrast. | Claro Walnut Burl Pieces |
| Larger Custom Project | Live edge slabs, dimensional lumber, or larger wood pieces that give you more flexibility for layout and shaping. | Live Edge Wood |
The Most Important Things to Check Before Buying Wood for Epoxy
- Size: Make sure the wood fits the mold, form, or finished project size you have in mind.
- Thickness: Check whether the piece is thick enough for your finished board after sanding and flattening.
- Moisture and stability: Use dry wood that is suitable for woodworking and epoxy projects.
- Shape: Look at the outline, live edge, curves, and how the piece will sit inside the mold.
- Grain direction: Grain movement can make a simple project look much more intentional.
- Voids and cracks: These can be filled with epoxy and become part of the design.
- Colour: Consider how the natural wood colour will pair with your epoxy pigment.
- Final use: A serving board, wall art piece, tray, and furniture part may all need different finishing choices.
Choose Wood That Fits Your Mold Size
One of the most common mistakes is choosing a wood piece before thinking about the mold size. For epoxy serving boards and charcuterie boards, the wood needs to leave enough room for the resin pour while still creating a useful finished board.
If the wood takes up too much of the mold, there may not be enough room for epoxy to become a design feature. If the wood is too small, the finished piece may feel more like a resin block than a wood and epoxy board.
10" x 18" Mold
A popular size for smaller epoxy serving boards, charcuterie boards, and giftable resin projects.
Shop 10" x 18" Mold12" x 24" Mold
A versatile option for larger serving boards, trays, and projects where you want more wood and resin layout flexibility.
Shop 12" x 24" MoldLarger & Round Molds
Useful for statement boards, round pours, trays, wall art, and larger epoxy projects.
Shop Round MoldsFor a more detailed breakdown, read our guide on what size mold you need for an epoxy serving board.
Look for Character That Will Work With Resin
For traditional woodworking, cracks, knots, holes, bark inclusions, and irregular edges are sometimes considered defects. For epoxy projects, those same features can become the most interesting part of the finished piece.
Live Edges
Natural edges create movement and contrast between the wood and epoxy. They are especially useful for river-style pours and serving boards.
Read the Live Edge GuideCracks & Voids
Cracks, checks, knots, and small voids can be filled with clear, tinted, metallic, or colour-shift epoxy.
Shop Beaver Dust PigmentsBurl & Figure
Highly figured pieces can create premium-looking projects, especially when paired with clear or subtle epoxy colours.
Shop Claro Walnut Burl PiecesPick the Right Wood Species for the Look You Want
Every species has a different look. Some woods are dark and dramatic, some are light and clean, and others have bold grain that becomes the main feature of the project.
| Species | Why It Works for Epoxy | Best Project Types | Shop |
|---|---|---|---|
| Walnut | Rich brown colour, strong contrast, classic look, and excellent pairing with black, gold, blue, green, clear, and pearl epoxy. | Charcuterie boards, serving boards, premium gifts, river-style boards | Shop Walnut Pieces |
| Olive Wood | Bold grain movement, warm tones, and a naturally decorative look that works well for statement pieces. | Serving boards, decorative boards, resin gifts, small statement projects | Shop Olive Wood Pieces |
| Ambrosia Maple | Lighter background with natural streaking and character, making it a good contrast wood for coloured epoxy. | Lighter boards, modern serving pieces, contrast-heavy resin pours | Shop Ambrosia Maple Pieces |
| Cherry | Warm colour and classic hardwood appearance that pairs well with clear, bronze, copper, black, and warm metallic epoxy tones. | Serving boards, trays, classic woodworking gifts | Shop Cherry Pieces |
| White Oak | Clean, neutral appearance that works well for modern boards, trays, and subtle epoxy colour combinations. | Modern serving boards, trays, furniture-style projects | Shop White Oak Pieces |
| Claro Walnut Burl | Dramatic figure, burl character, and irregular grain that can create one-of-a-kind premium resin projects. | Resin art, wall art, premium boards, decorative pieces | Shop Claro Walnut Burl Pieces |
For a deeper breakdown, read our guide to the best wood for epoxy charcuterie boards.
Remember: Wood Is Natural and Every Piece Is Different
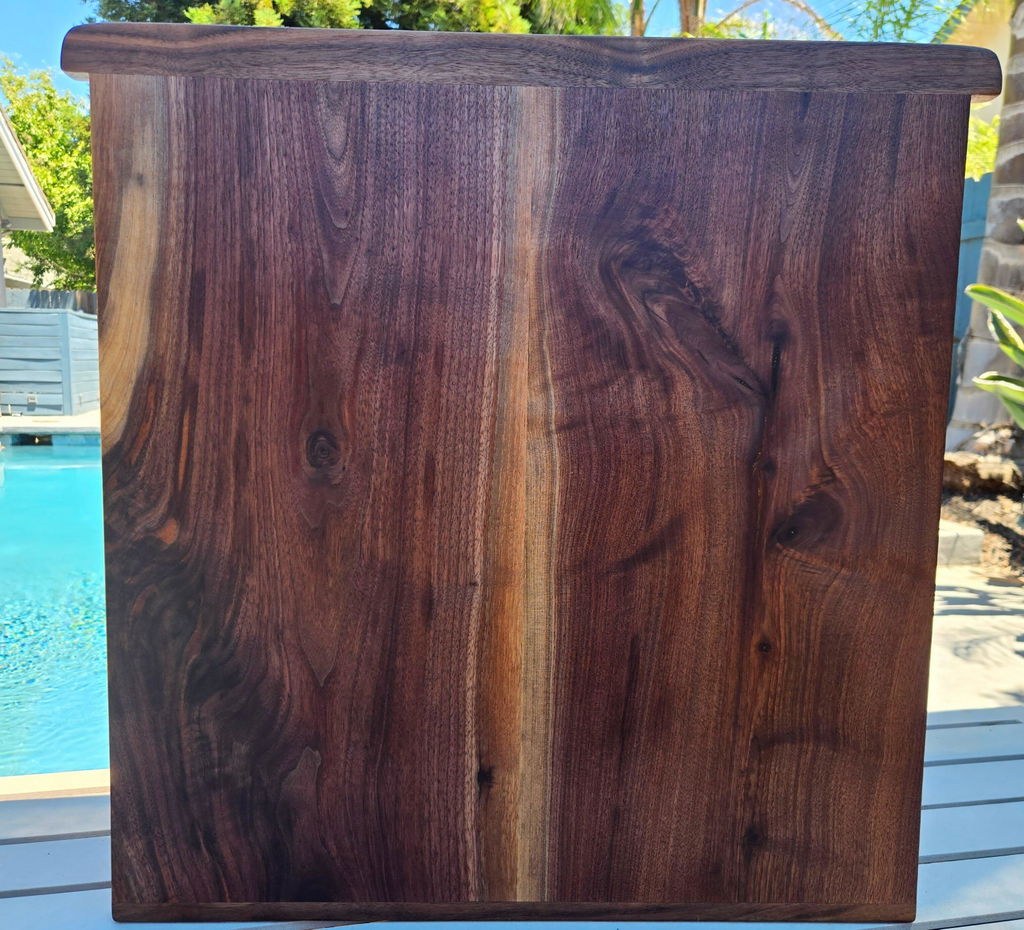
Natural wood can include colour variation, grain changes, checks, knots, live edge variation, bark inclusions, figure, sapwood, and irregular shape. For epoxy projects, these details are often what make the final piece special.
When buying a one-of-a-kind piece, look closely at the photos and choose the piece that best fits your layout, mold size, and design plan.
Why Individually Photographed Pieces Are Helpful
When making an epoxy board or resin project, the exact piece of wood matters. A generic product photo cannot show you where the live edge curves, where the cracks are, how the grain moves, or how the wood might sit inside a mold.
With individually photographed wood pieces, you can choose the exact piece for your project before it arrives. This makes it easier to plan your epoxy colour, mold layout, cutting, sanding, and finished design.
- You can choose the actual grain pattern you like.
- You can see the shape and live edge before buying.
- You can plan where epoxy will fill cracks, gaps, or voids.
- You can better match the piece to a mold size.
- You can choose a piece that fits the style of your finished board.
For more detail, read One-of-a-Kind Wood Pieces: What to Look For Before You Buy.
Match the Wood to the Right Epoxy and Pigment
The epoxy colour should support the wood, not fight against it. Dark woods like walnut often pair well with black, gold, pearl, blue, green, and metallic pigments. Lighter woods like ambrosia maple and white oak can work well with darker colours, smoky tones, clear pours, and modern muted colours.
Deep Pour Epoxy
Use deep pour epoxy for thicker castings, deeper voids, river-style boards, and projects where you need more pour depth.
Shop EcoPoxy FlowCastTable Top Epoxy
Use table top epoxy for coating, sealing, and thinner surface applications where a clear protective layer is needed.
Shop EcoPoxy UVPoxyPigments
Use mica powder, liquid pigments, fluorescent colours, neon-style effects, metallics, and colour-shift pigments to customize your pour.
View Pigment CollectionPlan for Sanding and Finishing Before You Start
The wood you choose should leave enough room for sanding, shaping, and finishing. Even if the piece is already flattened, most epoxy projects still need sanding after the pour to bring the wood and resin to the same surface level.
For serving boards, charcuterie boards, and similar projects, choose a finish that is appropriate for the intended use of the board.
Sanding Supplies
Use the right sanding progression to prepare the wood and epoxy surface before applying your finish.
Shop Sanding SuppliesGrand Finishing Hardwax Oil
A popular finish option for wood projects where you want a clean, natural-looking finish.
Shop Grand Finishing Hardwax OilFinishing Accessories
Use shop towels and applicator pads to help apply and wipe back oil or hardwax oil finishes.
Shop Wypall X60 TowelsFor more finishing help, read our guide on how to finish a wood and epoxy serving board.
Quick Buying Checklist
Before choosing your wood piece, ask yourself these questions:
- What finished project am I making?
- What size mold or form am I using?
- Do I want the finished piece to be mostly wood, mostly epoxy, or balanced?
- Does the wood fit the mold with enough space for resin?
- Do I like the grain direction and live edge shape?
- Are the cracks, voids, or knots features I want to highlight with epoxy?
- What epoxy colour or pigment will pair well with the wood species?
- Will the piece still be thick enough after sanding and finishing?
- What finish will I use once the project is complete?
Helpful Guides to Read Next
Choose the Exact Wood Piece for Your Next Epoxy Project
Browse individually photographed walnut, olive wood, claro walnut burl, ambrosia maple, cherry, white oak, and other one-of-a-kind pieces for epoxy boards, resin pours, serving boards, and custom woodworking projects.