Live Edge Wood for Resin Projects, Epoxy Boards and River-Style Pours
Live edge wood is one of the most popular choices for resin projects because the natural edge creates movement, contrast, and a more organic transition between wood and epoxy. It works well for epoxy serving boards, charcuterie boards, river-style pours, resin trays, wall art, and custom woodworking projects.
This guide explains what live edge wood is, why it works well with epoxy, how to choose the right piece, and which supplies can help you complete your project.
What Is Live Edge Wood?
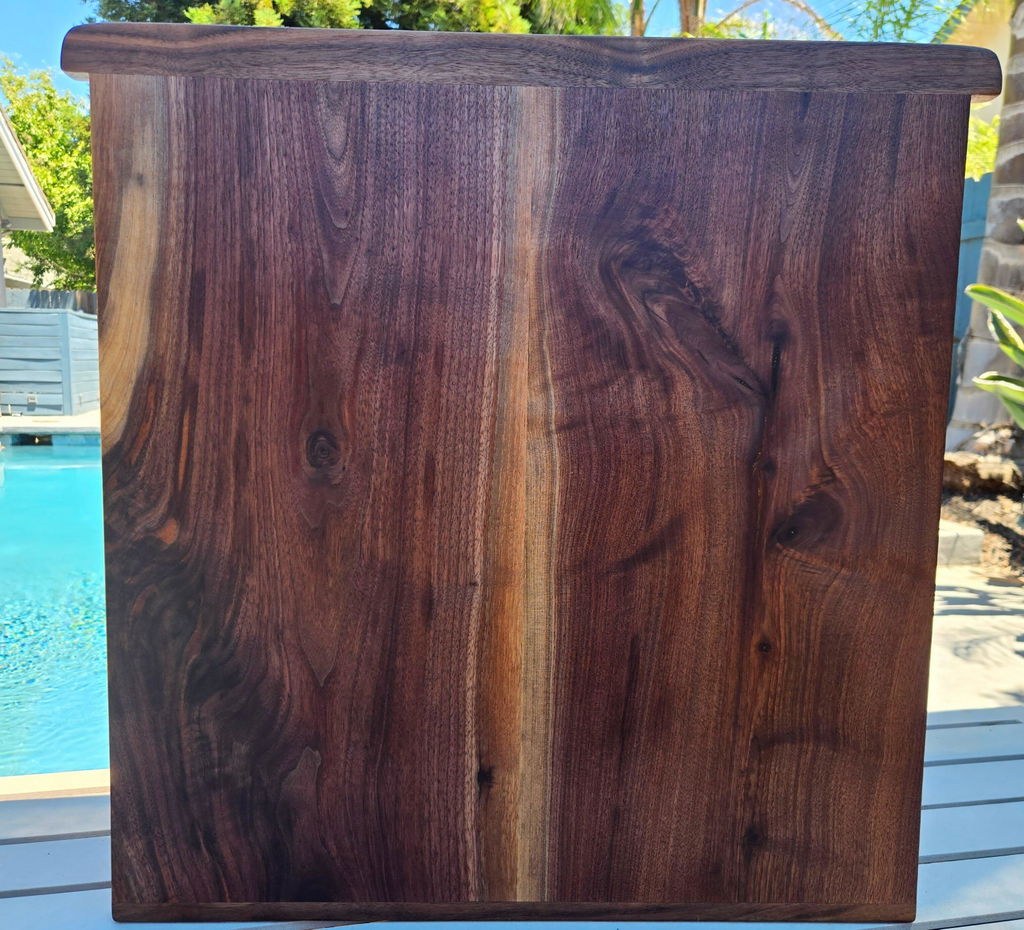
Live edge wood keeps some or all of the tree’s natural edge instead of being cut into a perfectly straight board on every side. That natural edge can include curves, movement, bark lines, voids, cracks, colour variation, and irregular shapes.
For epoxy projects, those natural features can become part of the design. The edge of the wood can create a river shape, a resin-filled border, a dramatic transition, or an organic layout that would be difficult to create with regular dimensional lumber.
Why Live Edge Wood Works Well With Resin
- Natural movement: Curves and irregular edges create more interesting resin lines.
- Better contrast: The transition between wood and epoxy feels more organic than a straight cut line.
- More character: Cracks, knots, voids, and grain variation can be highlighted with clear or coloured epoxy.
- One-of-a-kind results: No two live edge pieces are exactly the same.
- Flexible project options: Live edge wood can be used for serving boards, trays, wall art, river boards, and custom builds.
Best Resin Projects for Live Edge Wood
Live edge wood can be used in many different resin and epoxy projects. The best project depends on the size, shape, thickness, and character of the piece.
Epoxy Serving Boards
Live edge pieces can create beautiful serving boards where resin fills the edge, centre, cracks, or voids.
Best Wood for Epoxy BoardsRiver-Style Boards
Two live edge pieces can be arranged with a resin channel between them to create a smaller river-style board.
Read the Mold Size GuideResin Trays
Live edge wood can be used in tray projects where the wood creates movement and the epoxy adds colour or depth.
Shop HDPE Epoxy MoldsWall Art
Highly figured, cracked, or irregular live edge pieces can work well for decorative resin wall art.
Shop Claro Walnut Burl PiecesCustom Furniture Details
Larger live edge pieces can be used in custom furniture, river-style tops, shelves, benches, and decorative builds.
Shop Live Edge WoodGift Projects
Smaller live edge pieces can be turned into one-of-a-kind handmade gifts, serving boards, and display pieces.
Shop One-of-a-Kind PiecesLive Edge vs One-of-a-Kind Pieces vs Dimensional Lumber
All three can be useful, but they are not the same. Choosing the right type of wood depends on your project style and how much natural character you want in the finished piece.
| Wood Type | Best For | Why Choose It? | Shop |
|---|---|---|---|
| Live Edge Wood | River-style pours, serving boards, tables, shelves, wall art, custom builds | Natural edges, organic curves, larger project options, strong visual character | Shop Live Edge Wood |
| One-of-a-Kind Wood Pieces | Epoxy boards, resin art, trays, charcuterie boards, smaller project blanks | Individually photographed pieces where you choose the exact shape, grain, and character | Shop One-of-a-Kind Pieces |
| Dimensional Lumber | Cutting boards, furniture parts, shelves, craft projects, predictable builds | More uniform sizing and cleaner edges when you need repeatable project stock | Shop Dimensional Wood |
What to Look For in Live Edge Wood for Resin
When choosing live edge wood for a resin project, the exact piece matters. Look at the shape, edge movement, grain, cracks, colour, thickness, and whether it fits the mold or finished project size.
Natural Edge Shape
The live edge should create an interesting transition between the wood and epoxy. Curves, movement, and negative space can all improve the final design.
How to Choose Wood for EpoxyCracks and Voids
Cracks, checks, knots, and voids can be filled with resin and turned into intentional design details.
Shop Beaver Dust PigmentsGrain Movement
Strong grain can make the finished project feel more dynamic, especially when the epoxy colour supports the wood rather than hiding it.
Choosing One-of-a-Kind PiecesSize and Mold Fit
The piece should fit your mold or project plan while leaving enough room for resin to become part of the design.
Read the Mold Size GuideThickness
Make sure the piece has enough thickness for the final board after flattening, sanding, trimming, and finishing.
Shop Sanding SuppliesSpecies and Colour
Different wood species pair better with different epoxy colours. Walnut, olive wood, cherry, white oak, and burl all create different looks.
Best Wood for Epoxy BoardsNatural Edge Does Not Mean Ready Without Prep
Live edge wood often needs preparation before resin work. Depending on the piece and project, this may include removing loose bark, cleaning the edge, sealing cracks, planning the layout, flattening, sanding, and making sure the wood is stable before pouring epoxy.
Always inspect the exact piece and prepare it for the type of project you are making.
Best Wood Species for Live Edge Resin Projects
Many hardwood species can work for live edge resin projects. The best choice depends on the colour, grain, and finished style you want.
| Species | Why It Works | Best Project Types | Shop |
|---|---|---|---|
| Walnut | Rich brown colour, strong contrast, and a premium look that works well with many epoxy colours. | River boards, serving boards, trays, premium gifts, wall art | Shop Walnut Pieces |
| Olive Wood | Bold grain movement and warm tones that create statement pieces with minimal effort. | Serving boards, decorative boards, resin art, gift projects | Shop Olive Wood Pieces |
| Cherry | Warm colour and a classic hardwood look that pairs well with clear, bronze, copper, black, and warm metallic epoxy. | Serving boards, trays, classic handmade gifts | Shop Cherry Pieces |
| White Oak | Clean, modern appearance that works well with black, white, grey, clear, and neutral resin colours. | Modern boards, trays, furniture-style projects | Shop White Oak Pieces |
| Claro Walnut Burl | Dramatic figure, irregular grain, and premium character for one-of-a-kind resin projects. | Wall art, resin art, decorative boards, statement projects | Shop Claro Walnut Burl Pieces |
| Ambrosia Maple | Lighter colour with natural streaking and character that can contrast well with darker epoxy. | Light serving boards, modern resin projects, contrast-heavy pours | Shop Ambrosia Maple Pieces |
Choosing Epoxy for Live Edge Wood
The epoxy you choose depends on the pour depth and project type. For filling deeper voids, river channels, and casting-style projects, deep pour epoxy is commonly used. For coating, sealing, or thinner surface applications, a table top epoxy is usually a better fit.
EcoPoxy FlowCast
Use deep pour epoxy for casting, deeper voids, river-style pours, and thicker wood and resin sections.
Shop EcoPoxy FlowCastEcoPoxy UVPoxy
Use table top epoxy for coating, sealing, and thinner surface applications on wood and epoxy projects.
Shop EcoPoxy UVPoxyEpoxy Accessories
Mold accessories, clamping blocks, dividers, sealant, and paddle mixers can help with setup, mixing, and layout.
Shop Epoxy AccessoriesChoosing Pigment Colours for Live Edge Resin Projects
The best pigment colour depends on the wood species and finished style. If the wood has dramatic grain, a simpler epoxy colour can help keep the focus on the wood. If the wood is more neutral, the pigment can become the main design feature.
Mica Pigments
Mica pigments can add shimmer, pearl effects, metallic colour, and movement to epoxy pours.
Shop Beaver Dust PigmentsColour Shift Pigments
Colour-shift pigments are useful when you want a more dramatic effect that changes depending on the angle of light.
Shop Colour Shift PigmentsFluorescent / Neon Pigments
Fluorescent pigments are often called neon colours and can create bright, bold resin effects.
Shop Fluorescent PigmentsUsing Live Edge Wood in Reusable HDPE Molds
Reusable HDPE molds are useful for epoxy serving boards, trays, and resin projects because they help control the finished shape. When using live edge wood in a mold, test the layout before mixing epoxy.
Make sure the wood fits comfortably inside the mold, leaves enough room for resin, and creates a design that works with the finished board shape.
10" x 18" Mold
A practical size for smaller live edge epoxy serving boards, compact boards, and giftable resin projects.
Shop 10" x 18" Mold12" x 24" Mold
A versatile size for larger serving boards, trays, and projects where you want more room for wood placement and epoxy flow.
Shop 12" x 24" MoldRound Molds
Round molds are useful for circular boards, trays, wall art, and decorative resin pours.
Shop Round HDPE MoldsFor more help choosing a mold, read What Size Mold Do I Need for an Epoxy Serving Board?
Layout Tip: Let the Edge Do the Work
With live edge resin projects, the natural edge is often the most interesting design element. Instead of forcing a complicated layout, try positioning the wood so the live edge creates a natural resin channel, border, or flow line.
A good piece of live edge wood can make the project look custom before any pigment is added.
Finishing Live Edge Wood and Resin Projects
After the epoxy cures, most projects need trimming, sanding, and finishing. The live edge area may need extra attention because the surface can include curves, texture, cracks, or small details that are different from the flat faces of the board.
For serving boards and charcuterie boards, use a finish that is appropriate for the intended use of the piece and follow the finish manufacturer’s instructions.
Sanding Supplies
Use sanding supplies to level, smooth, and prepare the wood and epoxy surface before finishing.
Shop Sanding SuppliesGrand Finishing Hardwax Oil
A popular finish option for wood projects where you want a clean, natural-looking finish.
Shop Grand Finishing Hardwax OilFinishing Accessories
Shop towels and white applicator pads can help apply and wipe back oil or hardwax oil finishes.
Shop Wypall X60 TowelsFor a full breakdown, read How to Finish a Wood and Epoxy Serving Board.
Common Mistakes With Live Edge Resin Projects
| Mistake | Why It Matters | Better Approach |
|---|---|---|
| Choosing a piece only because it is live edge | Not every live edge piece has the right shape, size, or grain for the project. | Choose based on the exact layout, mold fit, edge shape, and finished design. |
| Leaving loose bark or debris | Loose material can interfere with the epoxy bond or finished look. | Clean and prepare the edge before pouring resin. |
| Not planning the epoxy space | The resin area may look accidental if the wood fills too much or too little of the mold. | Test the layout before mixing epoxy. |
| Using a pigment that hides the wood | A very strong colour can overpower the grain and live edge character. | Choose pigment colours that support the wood species and project style. |
| Forgetting about sanding and finishing | The project still needs to be surfaced, sanded, cleaned, and finished after curing. | Plan the full workflow before starting the pour. |
Helpful Guides to Read Next
- How to Choose Wood Pieces for Epoxy Projects
- One-of-a-Kind Wood Pieces: What to Look For Before You Buy
- Best Wood for Epoxy Charcuterie Boards
- What Size Mold Do I Need for an Epoxy Serving Board?
- How to Make an Epoxy Charcuterie Board
- How to Finish a Wood and Epoxy Serving Board
- Wood for Epoxy Projects Hub
Choose Live Edge Wood for Your Next Resin Project
Browse live edge wood, one-of-a-kind pieces, epoxy molds, pigments, sanding supplies, and finishing products for your next wood and resin project.